
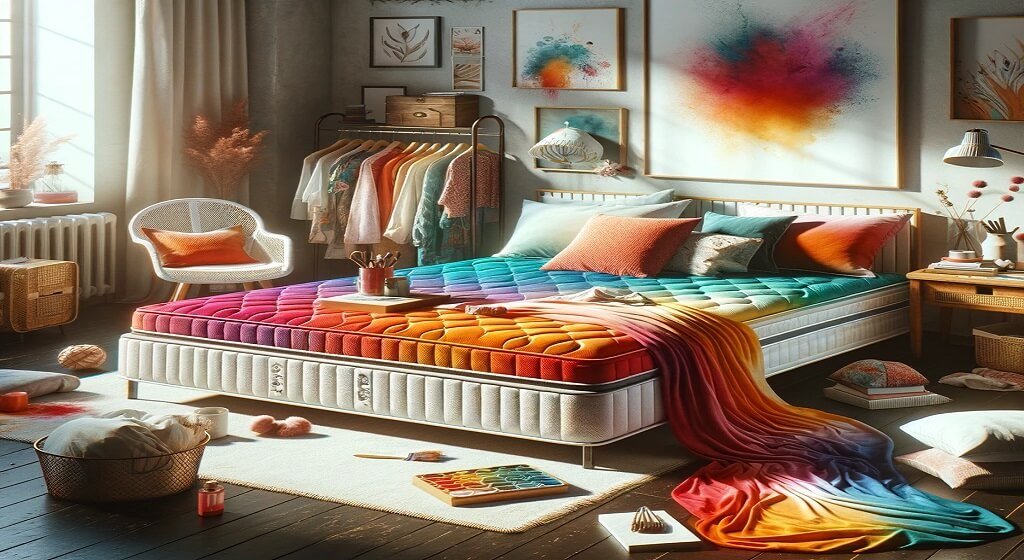
Imagine transforming your bedroom into a haven of comfort and style, where each element resonates with your aesthetic. Central to this transformation is your mattress, a key player in your sleep space. But rather than investing in a brand-new mattress to match your decor, have you considered the unique option of dyeing your existing one? This guide delves into the innovative world of mattress dyeing, a creative yet practical approach to revamping your bedroom.
Dyeing a mattress might sound unconventional, but it’s an increasingly popular method for those looking to personalize their sleep space without breaking the bank. Not only does it offer a fresh look, but it also contributes to a sustainable lifestyle by extending the life of your mattress. Whether you’re a DIY enthusiast or exploring cost-effective ways to enhance your bedroom, this guide provides all the know-how you need to transform your mattress with a splash of color.
In the following sections, we’ll explore everything from the feasibility of dyeing different types of mattresses to a step-by-step guide on effectively doing it. Plus, we’ll cover essential care tips to keep your newly dyed mattress looking its best. Whether you’re curious about this process or ready to dive into your next DIY project, let’s embark on this colorful journey to redefine your sleep space.
Can You Dye a Mattress?
Exploring the Possibilities of Transforming Your Mattress with Color
One of the first questions that come to mind when considering a bedroom makeover is: Can you dye a mattress? The answer is a resounding yes but with a few caveats. Not all mattresses are suitable for dyeing, and the process requires a specific approach to ensure safety and effectiveness.
Suitable Mattresses for Dyeing
- Innerspring Mattresses with Cotton Covers: These are the most dye-friendly. The natural fibers in the cotton cover absorb dye well, allowing for a more vibrant and lasting color change.
- Foam Mattresses: While foam mattresses can be dyed, the process is more challenging. The foam doesn’t take dye, so you’re staining the cover. Choose water-based dyes to prevent damage to the foam.
- Hybrid Mattresses: These can be tricky to combine with innerspring and foam. If the cover is removable and made of a dyeable material, you’re in luck. Otherwise, it’s best to avoid dyeing these types.
Factors to Consider
- Fabric Type: Natural fibers like cotton absorb the dye more effectively than synthetic materials.
- Mattress Age and Condition: An older mattress might not take the dye, and a newer one might not. Also, consider the cleanliness and overall condition of your mattress before dyeing.
- Color Choice: Darker dyes better cover any existing stains or discoloration on the mattress.
- Safety and Health: Ensure that the dyes used are non-toxic and safe for prolonged contact, which is especially important for something you sleep on every night.
Conclusion
Dyeing a mattress is possible, opening up a world of creativity for your bedroom decor. However, it’s crucial to assess the type of mattress you own and consider the practical aspects of the dyeing process. With the proper preparation and knowledge, you can successfully transform your mattress, giving it a new lease of life and a personal flair.
Benefits of Dyeing Your Mattress
Unveiling the Advantages of a Colorful Transformation
Dyeing your mattress isn’t just about changing its color; it’s a creative venture with many benefits. This section highlights why staining your mattress can be a game-changer in enhancing your sleep space.
1. Aesthetic Enhancement
- Personalization: Dyeing allows you to tailor the look of your mattress to your personal style and bedroom decor. Whether you prefer bold hues or subtle tones, the choice is yours.
- Revitalization: An old mattress can be given a new life with a fresh color, making your sleep space feel renewed and vibrant.
2. Cost-Effectiveness
- Economical Makeover: Compared to buying a new mattress, dyeing is a budget-friendly alternative. It’s an economical way to impact your bedroom’s appearance significantly.
- Sustainability: You’re contributing to a more sustainable lifestyle by dyeing and reusing your current mattress. It’s an eco-friendly choice that reduces waste and consumption.
3. Extended Mattress Life
- Protection: A good dye job can add a layer of security to the mattress fabric, shielding it from minor stains and wear.
- Renewed Comfort: While dyeing doesn’t change the structural comfort of the mattress, a refreshed look can psychologically enhance your comfort and satisfaction with your sleep space.
4. Versatility in Design
- Matching with Decor: Dyeing your mattress allows you to match or complement other elements in your bedroom, like curtains, rugs, or wall color.
- Thematic Rooms: Ideal for children’s rooms, guest rooms, or thematic spaces where you want the mattress to align with a specific theme or color scheme.
5. Fun and Fulfilling DIY Project
- Creative Outlet: For those who love DIY projects, dyeing a mattress offers a fun and rewarding experience.
- Skill Development: It’s an opportunity to learn a new skill and understand the principles of fabric dyeing and color theory.
In summary, dyeing your mattress is more than just a superficial change. It’s an innovative way to bring personalization, cost-effectiveness, and creativity into your bedroom. By choosing to dye your mattress, you’re not just upgrading its look; you’re embracing an eco-friendly, budget-friendly, and fulfilling approach to home improvement.
Preparation for Dyeing
Getting Ready for a Colorful Makeover
Before diving into the dyeing process, proper preparation is crucial. This ensures the success of your dyeing project and safeguards your space and mattress. Here’s a comprehensive guide on how to prepare for dyeing your mattress.
1. Gather Your Materials
- Fabric Dye: Choose a dye suitable for the mattress fabric. For natural fibers like cotton, use fiber-reactive dyes. For synthetic fibers, consider dyes formulated explicitly for synthetics.
- Protective Gear: Gloves, aprons, and safety glasses to protect yourself from stains and spills.
- Drop Cloths or Plastic Sheeting: Protect your flooring and surrounding area from dye splashes.
- Spray Bottles or Sponge: Apply the dye evenly across the mattress.
- Mild Detergent: This is used to clean the mattress before dyeing.
2. Choosing the Right Space
- Ventilated Area: Ensure good air circulation to avoid inhaling fumes.
- Spacious and Non-Porous Surface: You need enough space to work around the mattress and a surface that won’t absorb spills.
3. Preparing the Mattress
- Cleaning: Clean your mattress thoroughly. Remove dust, dirt, and stains as much as possible for even dyeing.
- Drying: The mattress should be completely dry before applying dye.
- Removing Obstacles: If your mattress has a removable cover, remove it for easier dyeing. Also, remove any attachments or embellishments that might hinder the process.
4. Testing the Dye
- Patch Test: Apply dye on a small, inconspicuous mattress area to check for color fastness and final appearance.
5. Setting Realistic Expectations
- Color Variations: Understand that the final color may vary based on the mattress’s original color and fabric type.
- Evenness: Achieving a perfectly even color can be challenging, especially for more significant mattresses.
Conclusion
Preparation is vital to a successful mattress dyeing project. You can confidently embark on this creative endeavor by gathering suitable materials, preparing your space and mattress, and conducting a patch test. Remember, the effort you put in preparation directly influences the quality and satisfaction of your final results.
Step-by-Step Guide to Dyeing Your Mattress
Transforming Your Mattress with Color: A Detailed DIY Approach
Embarking on the journey of dyeing your mattress can be an exciting DIY project. This step-by-step guide ensures you’re well-equipped for a successful and enjoyable dyeing experience.
Step 1: Choose Your Dye
- Select a Fabric Dye: Opt for a non-toxic, fabric-specific dye suitable for the mattress cover material. For cotton covers, use a fiber-reactive dye; for synthetic covers, use a dye that works on synthetic fibers.
Step 2: Prepare the Materials
- Gather Supplies: You’ll need fabric dye, rubber gloves, a large brush or sponge, plastic sheets to protect the surrounding area, and a bucket or spray bottle for the dye.
- Prepare the Workspace: Cover the floor with plastic sheets and ensure good ventilation in the room.
Step 3: Prepare the Mattress
- Clean the Mattress: Ensure the mattress is clean and dry. Vacuum and spot-clean any stains.
- Remove the Mattress Cover: If possible, remove the cover. If not, tape off any areas you want to avoid being dyed.
Step 4: Mix the Dye
- Prepare the Dye Solution: Follow the instructions on the dye package. Mix the dye with the appropriate amount of water in a bucket or fill a spray bottle for application.
Step 5: Apply the Dye
- Dye Application: Apply the dye evenly using a brush or sponge in a bucket or spray it with a spray bottle. Ensure even coverage without oversaturating the fabric.
- Time Management: Allow the dye to set the time recommended on the package, usually a couple of hours.
Step 6: Rinse and Dry
- Rinse Excess Dye: Gently rinse off any excess dye without soaking the mattress.
- Dry the Mattress: Allow the mattress to dry completely, which may take up to 24 hours. Use fans or open windows to aid in the drying process.
Step 7: Reassemble and Enjoy
- Reassemble the Mattress: Once completely dry, put the cover back on; if removed, place the mattress back on the bed frame.
- Admire Your Work: Enjoy your dyed mattress’s fresh, new look and the revitalized feel of your sleep space.
Tips for Success
- Test First: Do a patch test with the dye on a small, inconspicuous mattress area.
- Even Application: Work in sections to spread the dye evenly across the mattress.
- Safety First: Wear gloves and old clothes to protect your skin and clothing from dye stains.
Following these steps, you can successfully dye your mattress, adding a personal touch to your bedroom. This process revamps your mattress and adds a unique and creative element to your sleep space.
Caring for Your Mattress
Essential Tips for Maintaining Your Newly Dyed Mattress
Proper care and maintenance are crucial for extending the life of your newly dyed mattress. Here’s a guide to help you keep your mattress in top condition, ensuring lasting comfort and durability.
1. Regular Cleaning
- Vacuum Regularly: Use a handheld vacuum to remove dust and allergens. This should be done every couple of months or more frequently if you have pets or allergies.
- Spot Clean Stains: Address spills and stains immediately using a mild detergent and a damp cloth. Avoid using harsh chemicals that can damage the fabric or affect the dye.
2. Protect the Dye
- Use a Mattress Protector: Invest in a good, washable mattress protector to safeguard the new color. This will also help protect the mattress from dust, spills, and wear.
- Avoid Direct Sunlight: Prolonged exposure to sunlight can cause the dye to fade. PositionPosition your bed away from direct sunlight or use window treatments if possible.
3. Regular Maintenance
- Rotate the Mattress: Rotate your mattress every 3-6 months to promote even wear and extend its lifespan. This is especially important in the first couple of years of use.
- Check for Wear and Tear: Regularly inspect your mattress for signs of wear or damage, particularly in areas where the dye was applied.
4. Handling a Dyed Mattress
- Be Gentle with the Fabric: The fabric might be more susceptible to damage after dyeing. Handle it gently during cleaning and maintenance.
- Avoid Moisture: Keep the mattress as dry as possible. Excessive moisture can lead to mold and mildew, which can degrade both the mattress and the dye.
5. Long-Term Care
- Professional Cleaning: Consider having your mattress professionally cleaned annually. This can help maintain its appearance and hygiene.
- Replacement Considerations: While dyeing can extend a mattress’s life, be mindful of its overall condition. Most mattresses have a lifespan of 7-10 years.
6. Special Considerations for a Dyed Mattress
- Re-Dyeing: If the color fades or you wish to change the color, the mattress can be re-dyed, following the same steps as the initial dyeing process.
- Odor Management: After dyeing, there might be a residual odor. Air out the mattress and use fabric fresheners if necessary.
Caring for your dyed mattress doesn’t have to be a daunting task. These simple and practical tips allow you to enjoy a vibrant, comfortable bed for years. Remember, regular care preserves the dye and contributes to a healthier, more enjoyable sleep environment.
Dyeing Your Bedding: A Complementary Approach
Harmonizing Your Sleep Space with Color-Coordinated Bedding
Once you’ve successfully dyed your mattress, you might wonder, “Can I dye my bedding too?” Absolutely! Staining your bedding is an excellent way to complement your newly revamped mattress, creating a harmonious and visually appealing sleep space.
1. Choosing the Right Dye
- Fabric Consideration: Like with your mattress, select a dye suitable for your bedding’s fabric. Cotton and linen take dye well, while synthetic fabrics may require a specific type of dye.
- Color Coordination: Pick a color that complements or matches your mattress. This creates a cohesive look in your bedroom.
2. Preparing Your Bedding
- Wash Before Dyeing: Clean your bedding to remove any oils, dirt, or fabric softeners that might interfere with dye absorption.
- Dampen the Fabric: For even dye application, dampen your bedding before applying the dye.
3. Dyeing Process
- Similar Steps as Mattress Dyeing: Follow a similar process as you did with your mattress. Mix the dye, apply it evenly, and allow it to set.
- Rinse and Wash: After dyeing, rinse out excess dye until the water runs clear, then wash the bedding in cold water.
4. Aftercare
- First Wash Alone: Wash your newly dyed bedding separately the first few times to prevent color bleeding.
- Regular Maintenance: Care for your dyed bedding like any colored fabric. Use gentle detergents and avoid high heat when washing and drying.
5. Benefits of Dyeing Bedding
- Aesthetic Appeal: Dyed bedding can dramatically change the look of your bedroom, enhancing its aesthetic appeal.
- Personal Touch: It adds a personal touch and allows creative expression in your sleep space.
- Cost-Effective: Dyeing is a cost-effective way to refresh old bedding or match new decor without purchasing new items.
6. Creative Ideas
- Mix and Match: Feel free to experiment with different colors for a dynamic look for sheets, pillowcases, and duvet covers.
- Patterns and Effects: Try techniques like tie-dye or ombre for a unique, stylish effect on your bedding.
In conclusion, dyeing your bedding is a fantastic way to extend the transformation of your sleep space. It enhances the overall look and creates a fun and creative DIY project that complements your dyed mattress. With these tips and ideas, you can create a comfortable sleep environment and a true reflection of your style.
Troubleshooting Common Issues
Navigating Challenges in Mattress and Bedding Dyeing Projects
Even with careful planning, you might encounter some challenges while dyeing your mattress or bedding. This section addresses common issues and provides practical solutions to help you navigate these hurdles successfully.
1. Uneven Dyeing
- Problem: The dye appears blotchy or uneven.
- Solution: Ensure even application by working in small sections and using a sponge or brush for a consistent spread. For large areas, a spray bottle can offer more uniform coverage.
2. Color Not as Expected
- Problem: The dye color on the mattress or bedding doesn’t match your expectations.
- Solution: Conduct a patch test before dyeing the entire surface. Remember, the original color of your mattress or bedding can affect the outcome.
3. Dye Fading Quickly
- Problem: The dye fades after a few washes or over time.
- Solution: Use high-quality fabric dye and follow the manufacturer’s instructions for setting the dye. Washing with cold water and mild detergents also helps preserve color.
4. Dye Transfer to Skin or Clothing
- Problem: The dye rubs off onto skin or clothing.
- Solution: Ensure thorough rinsing and washing post-dyeing. Consider setting the dye with a fixative or salt, as recommended for some fabric dyes.
5. Mattress Absorbing Too Much Moisture
- Problem: The mattress becomes overly saturated during the dyeing process.
- Solution: Apply dye sparingly and avoid soaking the mattress. Focus on dyeing the cover rather than the entire mattress.
6. Unpleasant Odor from Dye
- Problem: A strong odor remains after dyeing.
- Solution: Air out the mattress in a well-ventilated area. Use fabric fresheners or a mixture of baking soda and vacuuming to neutralize odors.
7. Stains or Discoloration
- Problem: Accidental spills or dye splatters during the process.
- Solution: Act quickly to clean any spills with a mild detergent. Cover surrounding areas with plastic sheets during the dyeing process to prevent accidents.
8. Health and Safety Concerns
- Problem: Concerns about the safety of the dyes used.
- Solution: Opt for non-toxic, eco-friendly dyes, and always work in a well-ventilated space. Wear protective gloves and old clothes during the dyeing process.
By anticipating these common issues and knowing how to address them, you can ensure a smoother and more successful mattress and bedding dyeing experience. Patience and attention to detail are vital in achieving the best results.
Personal Opinion and Feedback
Reflecting on the Journey of Dyeing a Mattress
Dyeing a mattress and bedding is undoubtedly a unique and creative endeavor. It’s not just a DIY project; it’s a journey into transforming and personalizing your sleep space. Based on my experience and observations, here are some personal insights and feedback on this process.
1. The Joy of Personalization
Dyeing your mattress offers an unparalleled opportunity for personalization. It’s incredibly satisfying to see a standard, perhaps even worn-out mattress, turn into your bedroom’s vibrant, aesthetically pleasing centerpiece. This process allows you to express your style and match your bedroom decor in ways purchasing a new mattress cannot.
2. Cost-Effectiveness and Sustainability
One of the most appealing aspects is the cost-effectiveness. Instead of splurging on a new mattress, dyeing your existing one can save money and contribute to sustainable living practices. It’s a win-win for your wallet and the environment.
3. Learning Curve and Patience
The process requires patience and a willingness to learn. The first attempt might be challenging, but it’s a learning experience. Understanding fabric types, dye methods, and the importance of even application are crucial skills gained during this process.
4. The Impact on Mattress Longevity
While dyeing can revitalize a mattress’s appearance, it’s important to remember that it doesn’t extend its functional life. Regular care and maintenance are needed to ensure the mattress remains comfortable and supportive.
5. Health and Safety Considerations
Using non-toxic, eco-friendly dyes is a must. The safety of the materials used can be balanced, especially for an item like a mattress, which has prolonged contact with skin.
6. Satisfaction and Enjoyment
The sense of accomplishment and satisfaction from completing such a project is immense. It’s not just about the result but also about enjoying transforming and rejuvenating your sleep space.
7. Recommendations
I highly recommend this project to anyone looking to add a personal touch to their bedroom. However, it’s essential to research, prepare adequately, and follow safety guidelines. Remember, the goal is to change the color and create a space that reflects your personality and enhances your comfort.
In conclusion, dyeing a mattress and bedding can be a rewarding project, both aesthetically and emotionally. It’s a testament to how a bit of color and creativity can profoundly transform everyday objects.
Conclusion
Embracing Change: The Final Word on Revamping Your Sleep Space
As we conclude our journey through the innovative process of dyeing a mattress, it’s clear that this unique DIY project offers more than just a color change. It’s a transformative experience that brings new life to your sleep space, reflecting your style and creativity.
Recap of Key Points
- Feasibility and Suitability: We explored the practical aspects of dyeing different mattresses, highlighting the importance of choosing the suitable fabric and dye.
- Benefits: The process is not only cost-effective and environmentally friendly, but it also allows for unmatched personalization and aesthetic enhancement of your bedroom.
- Step-by-Step Guide: Following a detailed guide ensures a successful dyeing experience, from preparation to the final touches.
- Care and Maintenance: We emphasized the importance of regular care, particularly for dyed mattresses, to extend their life and maintain their appearance.
- Complementary Bedding Dyeing: Dyeing your bedding to complement your mattress creates a cohesive and inviting sleep space.
- Troubleshooting: Addressing common issues can help overcome challenges, ensuring a smooth dyeing process.
Encouragement for Readers
To those considering this project: embrace the opportunity to infuse your bedroom with color and character. Whether you’re an experienced DIY enthusiast or a novice, dyeing your mattress can be fulfilling and enjoyable. It’s an opportunity to make your sleep space yours, a canvas where your comfort meets your creativity.
Final Thoughts
Revamping your sleep space by dyeing your mattress is more than a mere change of color; it’s a statement of personal identity and a step towards sustainable living. As you embark on this journey, remember that the beauty lies in the result and the process. Here’s to creating a sleep space that’s not just a place to rest but a reflection of your unique style and personality.