

Welcome to “The Ultimate Guide to Finding and Fixing Air Mattress Leaks,” your go-to source for keeping your air bed in top-notch condition. We understand the frustration that comes with discovering your cozy retreat deflated. That’s why we’re here to equip you with the know-how to tackle this standard problem head-on.
Furthermore, air mattresses are a popular choice for their convenience and comfort, especially for guests or during camping trips. However, they’re not without their challenges, the most notable being the dreaded air leak. A leaky air mattress can turn a restful night into an uncomfortable experience. Recognizing this, our guide is designed to help you find those elusive leaks and provide practical and easy-to-follow solutions to fix them.
Consequently, in this comprehensive guide, we’ll walk you through the entire process – from the initial detection of a leak to the final steps of repairing it. Whether you’re a seasoned air mattress user or new to the world of inflatable beds, our tips and tricks will ensure your air mattress remains a reliable and comfortable part of your life.
Table of contents
Quick Comparison of Leak Detection Methods
Before diving into the detailed step-by-step methods, here is a quick comparison of the most effective ways to spot an elusive air mattress leak. Choose the method that works best for your situation, or combine them for the best results:
| Detection Method | Effectiveness | Best For… | Time Needed |
|---|---|---|---|
| The Soapy Water Method | High (Recommended) | Micro-punctures, seam leaks, and valve area | 5 – 10 minutes |
| Tissue Paper Method | High | Finding leaks without water near seams and folds | 3 – 5 minutes |
| The Hand & Ear Test | Medium | Fast, mid-sized leaks in a completely silent room | 2 – 5 minutes |
| Baby Powder Method | Medium | Dry detection on smooth vinyl surfaces | 5 minutes |
| Submersion Method | Low to Medium | Small, non-electronic camping airbeds only | 5 – 10 minutes |
Why Is My Air Mattress Losing Air?
If you’ve ever wondered, “Why does my air mattress keep deflating overnight?” you’re not alone. Understanding the reasons behind air loss can help you locate leaks more easily and prevent future issues.
Slow Leaks vs. Sudden Punctures
Some leaks are gradual, caused by tiny holes or weaknesses in seams. These slow leaks can leave your mattress slightly deflated by morning. On the other hand, sudden punctures from sharp objects, like camping stakes or pet claws, cause rapid air loss. Knowing the type of leak helps determine the best detection method.
Temperature Changes and Material Stretching
Air mattresses are sensitive to temperature. Cold nights can cause the air inside to contract, leading to slight deflation without an actual hole. Conversely, warm temperatures expand the air, which can sometimes stress the seams. Furthermore, new air mattresses tend to stretch during the first few uses, which mimics a leak.
Overloading and Valve Issues
Exceeding the manufacturer’s weight limit or jumping on the mattress can weaken its material, causing leaks over time. Additionally, a common source of leaks is the air valve itself. Even a small gap or improper closure can let air escape smoothly overnight.
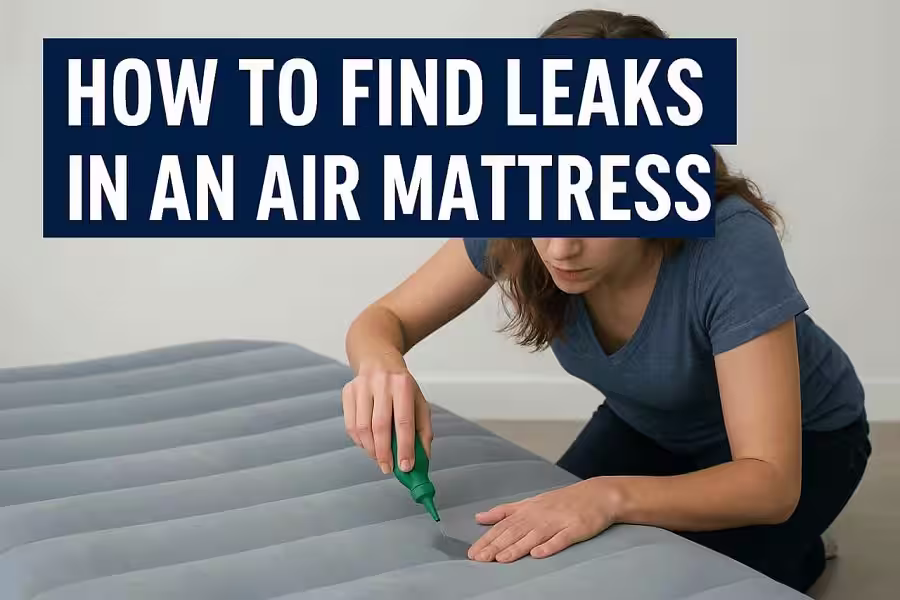
How to Find a Leak in an Air Mattress: Step-by-Step Methods
Discovering the exact location of a leak in your air mattress is like playing detective – it requires patience, attention to detail, and sometimes, a bit of creativity. Here are the most effective dry and wet methods to pinpoint holes:
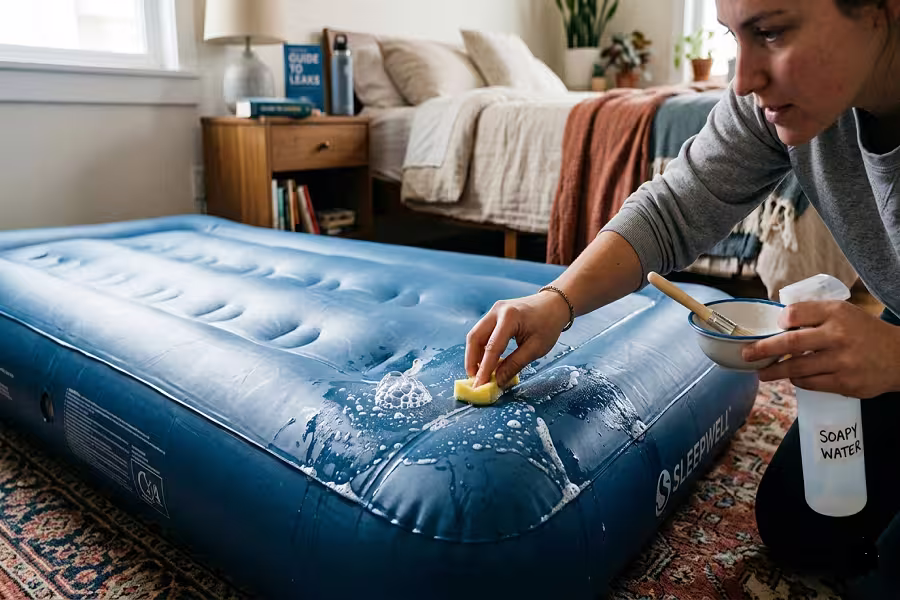
1. The Soapy Water Trick (Highly Recommended)
The soapy water method is a favorite among air mattress owners because it is incredibly precise for micro-punctures.
- What you’ll need: Warm water, bleach-free dish soap, a sponge or rag, and a bucket.
- Step 1: Mix the soap and water in a bucket to create a rich lather.
- Step 2: Apply the lather to the inflated mattress surface using a sponge.
- Step 3: Watch closely for bubbles forming – they are a telltale sign of escaping air.
- Step 4: Wipe the area dry and mark the leak with a marker for patching later.
2. Tissue Paper Method (Best Waterless Option)
A great option if you want to find a leak in an air mattress without water or risking mess. Best done in a low-breeze environment.
- Step 1: Fully inflate the mattress.
- Step 2: Hover a lightweight piece of tissue paper flat near seams, folds, and the valve.
- Step 3: The tissue will flutter or get pushed away by the escaping stream of air. Inspect both top and bottom surfaces thoroughly.
3. Baby Powder Method
This method is helpful if you want another dry way to visualize escaping air on smooth vinyl surfaces.
- Step 1: Sprinkle a thin layer of baby powder over the deflated mattress surface.
- Step 2: Inflate the mattress slowly and look for areas where the powder is blown away or disrupted by the air current.
4. Submersion Method
While highly visual with easy-to-spot bubbles, this method is messy and carries a risk of water getting inside the mattress. Note: This is best only for smaller, non-electronic camping airbeds.
- Step 1: Partially inflate your air mattress.
- Step 2: Submerge it sections at a time in a pool or a very large container of water.
- Step 3: Watch for air bubbles escaping rapidly from the hole. Dry completely to avoid mold growth.
5. Manual Inspection & Listening
- Remove all bedding and fully inflate the mattress inside a completely silent room.
- Start directly with the valve – feel and listen carefully for hissing air escaping from the rim.
- Run your bare hands slowly along the seams, joints, and the entire bottom surface to catch any faint air streams.

How to Fix and Patch an Air Mattress Leak
Now that you’ve identified and marked the leak, it’s time to seal it up. Successfully repairing an air mattress leak hinges on preparing the vinyl surface correctly.
Step-by-Step Patch Application Process
- Step 1: Deflate Completely: Initially, deflate the mattress completely to flatten the surface down. Attempting to patch an inflated bed will fail as internal air pressure pushes the adhesive out.
- Step 2: Clean and Prep: Clean the area around the leak with rubbing alcohol and a clean cloth to remove dirt or skin oils. If the leak is on the velvet/flocked top side, take fine-grit sandpaper and gently rub the area until the smooth vinyl underneath appears, then clean the plastic residue with alcohol.
- Step 3: Cut the Patch: Cut your patch material (from a retail kit or heavy-duty vinyl) so it’s slightly larger than the puncture, securing at least an extra half-inch to an inch of coverage around all sides.
- Step 4: Secure the Adhesive: Apply your strong vinyl adhesive or rubber cement to both the patch and the mattress, letting it sit for a minute until it becomes tacky.
- Step 5: Apply and Seal: Place the patch firmly over the leak, pressing from the center outward to smooth out bubbles. Apply a heavy weight over the patch and let it cure per the manufacturer’s instructions – usually a few hours to overnight.
Commercial Kits vs. Alternative Sealants
While DIY alternatives like strong duct tape or Flex Seal can offer a rapid temporary fix in emergencies, they are not reliable long-term solutions. Traditional patch kits offer a true chemical bond with the vinyl. If your mattress didn’t come with a backup patch, you can explore our curated guide on the best air mattress repair kit to find a durable solution.
Need an emergency heavy-duty backup patch for your upcoming camping trip or guest stay? Find our top-rated repair kits online:
Troubleshooting Common Issues
Why Does My Air Mattress Keep Deflating Overnight Without Holes?
If you’ve conducted a thorough soapy water check and found zero punctures, the issue might be environmental. Cold bedroom air causes internal air to contract, making the bed feel saggy by 4 AM. Furthermore, natural stretching of new vinyl material can mimic a leak during the first few uses.
How to Fix a Leaky Valve
Sometimes, the air isn’t escaping from a puncture, but from the inflation valve itself. Dust, lint, or pet hair can get trapped in the internal rubber seal, causing slow overnight deflation. Open the valve and use a clean cotton swab dipped in rubbing alcohol to wipe away any debris inside the rim. If the valve cap is structurally loose, wrapping a small strip of plumbing Teflon tape around the plastic threads can create a tighter airtight seal until you get a replacement from the manufacturer.
Preventing Future Leaks of Your Air Mattress
Maintaining your air mattress is crucial in extending its life and ensuring a comfortable sleep. Follow these simple guidelines to safeguard your bed:
- Avoid Over-Inflation: Overfilling puts unnecessary stress on the seams. Follow the manufacturer’s recommended air pressure for optimal performance.
- Clear the Ground: Whether indoors or car camping, ensure the floor is completely swept and free of sharp rocks, pine needles, or small toys. Use protective covers to shield the vinyl.
- Mind the Pets: Dog and cat claws can easily slice through unprotected vinyl. Keep cats and dogs with sharp claws away from the bed surface.
- Never Drag the Mattress: Always lift and carry the airbed. Dragging it across rough surfaces creates microscopic abrasions that quickly mature into leaks.
- Correct Storage: When not in use, deflate the mattress fully, fold it gently avoiding sharp folds, and store it in a cool, dry place away from direct sunlight.
Personal Insight on Finding Leaks in Air Mattresses
Having used and maintained numerous air mattresses over the years, I’ve learned that knowing how to find a leak goes beyond simple repair—it’s about proactive care. Small habits can make a huge difference in durability and comfort.
Where you use your mattress plays a significant role. Outdoors, sharp campsite debris poses threats, while indoors, everyday handling matters. I treat regular routine inflation checks like a “fitness check” for my mattress, ensuring it stays strong and resilient. A preventive mindset saves immense frustration down the line.
Frequently Asked Questions (FAQ)
1. How can I tell where my air mattress is leaking?
Inflate your air mattress fully and observe its firmness. If it deflates over a few hours, it’s likely leaking. You may hear a faint hissing sound near the leak. Using methods like soap lather, tissue paper, or baby powder can help pinpoint the exact location.
2. How do you find a hole in an air mattress with tissue paper?
Fully inflate the mattress and hover a piece of tissue paper over seams, folds, and the valve. Escaping air will make the tissue flutter, helping you locate the leak without using any water.
3. What should I do if my air mattress is losing air fast?
Immediately check the valve threads and major seams for visible splits. Use the soapy water detection method to pinpoint the location, then deflate and apply a permanent patch kit with heavy-duty adhesive right away.
Conclusion
Learning how to locate and fix a leak in an air mattress is an essential skill that saves both time and money. By combining precise detection tests like the tissue paper or soapy water methods with a methodical patching process, you can rescue your airbed from the trash bin and ensure many more nights of comfortable sleep. Take care of your mattress, keep a reliable repair kit handy, and happy sleeping!

Expert in the world of air mattresses and outdoor sleep solutions, with years of experience testing and reviewing products to ensure comfort and durability. My passion is to help people make the best choices for their sleep comfort, whether for camping adventures or overnight guests.